Loading Firmware
Note,upload firmware should use micro USB cube line, do not use radio telemetry to upload.
Connect flight controller to computer
Once you’ve installed a ground station on your computer, connect the flight controller using the micro USB cable as shown below. Use a direct USB port on your computer (not a USB hub).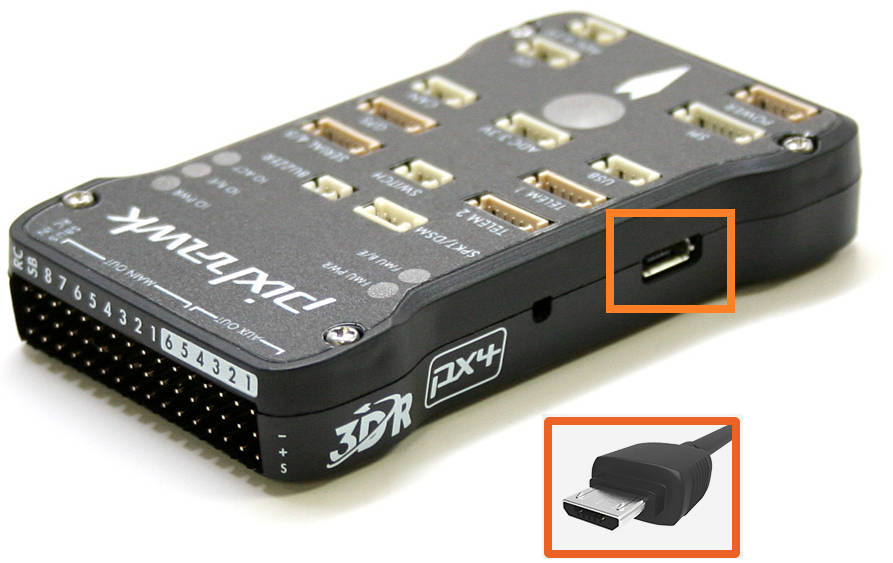 Pixhawk USB Connection
Windows should automatically detect and install the correct driver software.
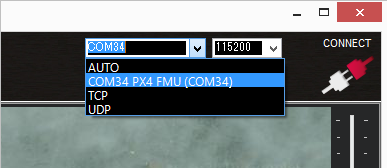
Select the COM port
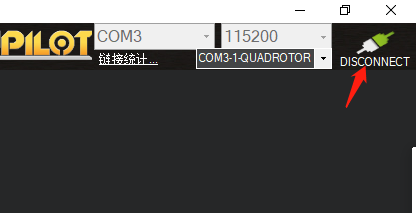
If using the Mission Planner select the COM port drop-down on the upper-right corner of the screen (near the Connect button). Select specific port (do not select AUTO)for your board (PX4FMU or Arduino Mega 2560). Set the Baud rate to115200 as shown.
If you can not detect the COM port ,maybe your board driver is not installed, please install it.
USB Driver for Pixhawk Boards
https://firmware.us.ardupilot.org/Tools/WindowsDrivers.zip
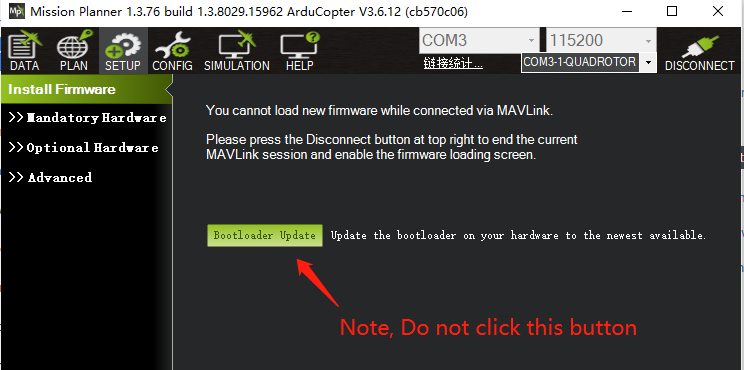
Upload firmware
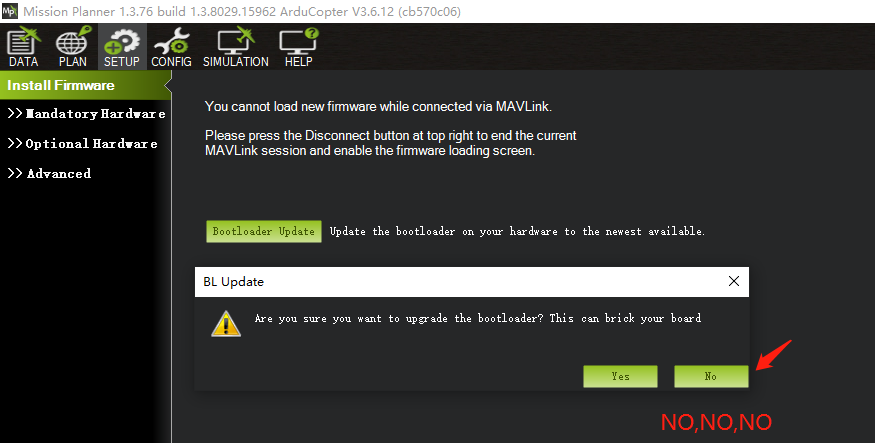
if you connect your pixhawk to Mission planner,Do not click BootLoader Update Button, Updating bootloader incorrectly will brick your pixhawk or cannot upload firmware .Now the latest Bootloader maybe has bug, we had upload the stable bootloader, you do not update now.You can update firmware(fox example arducopter or arduPlane) as you want.
If you accidentally click, remember to click "no"
You should click "Disconnect“ Button to upload firmware.
if you update bootloader incorrectly to cause pixhawk fail to boot or cannot upload firmware,please read here,
http://pix.rctoysky.com/how-to-update-bootloader-for-pixhawk-with-sd-card.html
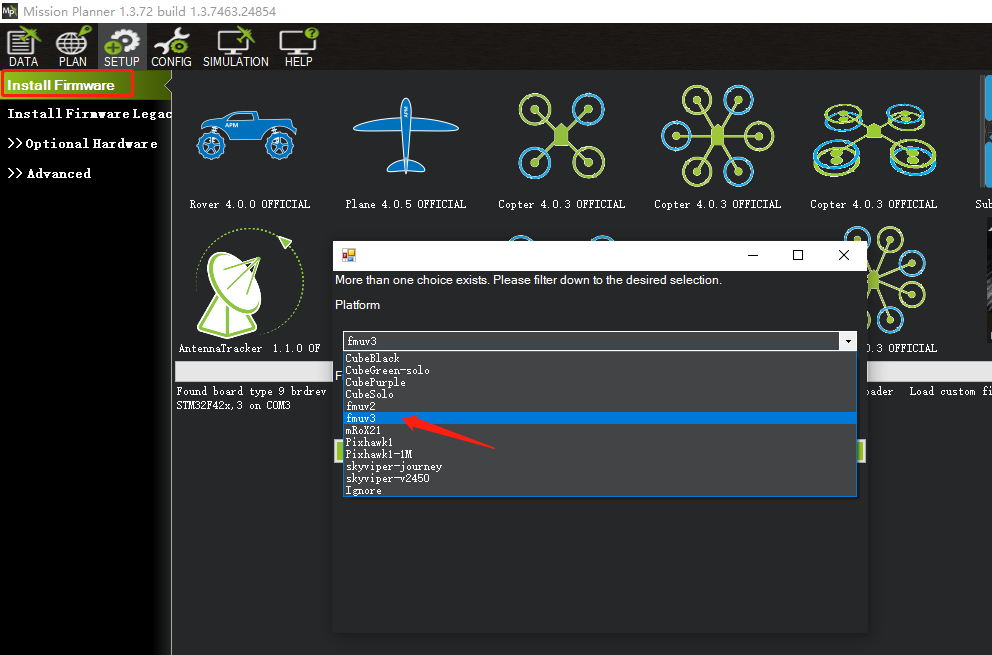
When your pixhawk is disconnected, you will see the uploading firmware Interface.
Make sure select “FMUV3", do not select other .
Legacy uploading firmware way.
On the Mission Planner’s Initial Setup | Install Firmware Leacy screen select the appropriate icon that matches your frame (i.e. Quad, Hexa). Answer Yes when it asks you “Are you sure?”.
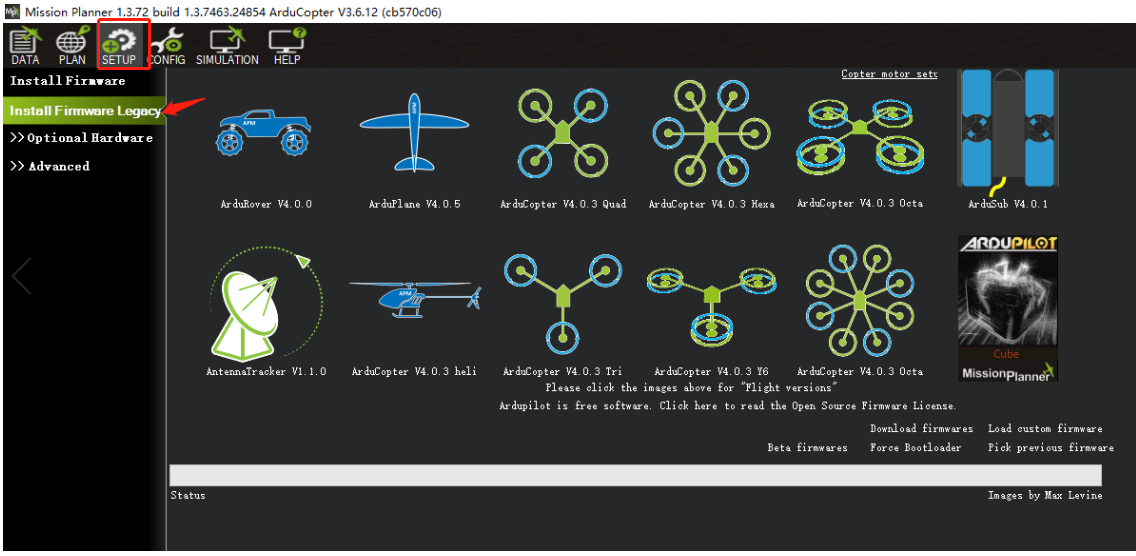
Mission Planner: Install Firmware Screen
After the GCS detects which board you are using it will ask you to unplug the board, plug it back in and then press OK within a few seconds (during this brief period the bootloader accepts requests to upload new firmware).
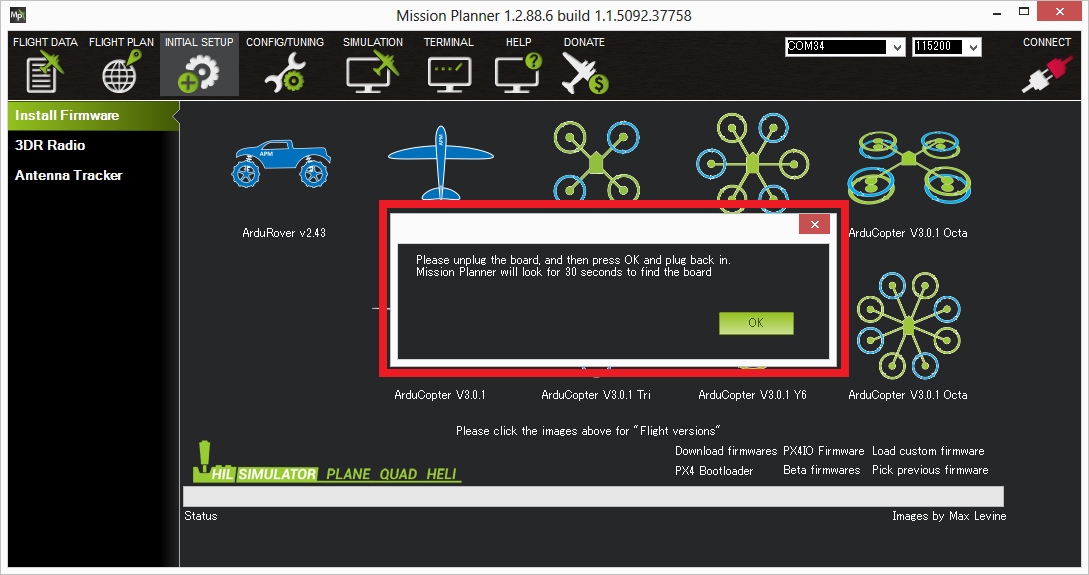 Mission Planner: Install FirmwarePrompt
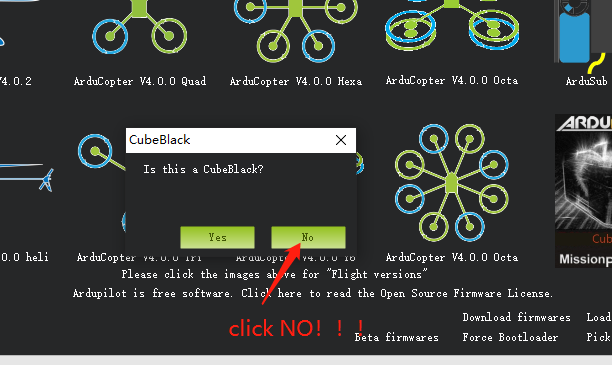
Next you may be asked “Is this a CubeBalck?”Remember to click NO,If you click Yes, should see here to solve it.
http://pix.rctoysky.com/upload-wrong-firmware-cubeblack.html
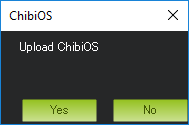
Next you may be asked “Upload ChibiOS?”. Most users will not notice a significant difference regardless of how this is answered.
- “Yes” will load ArduPilot using the newer ChibiOS operating system which results in a smaller and more efficient firmware but has a few missing features
- “No” will load ArduPilot using the older NuttX operating system.
Note,
- If you click Yes to upload the ChibiOS firmware, after that, the COM port will be diffrent with before, you should select the right COM port.
- IF you upload the chibiOS firmware, maybe you will meet PC driver problem,You can use the WIN10 system.
If all goes well you will see some status appear on the bottom right including the words, “erase...”, “program...”, “verify..” and “Upload Done”. The firmware has been succesfully uploaded to the board.
After Upload
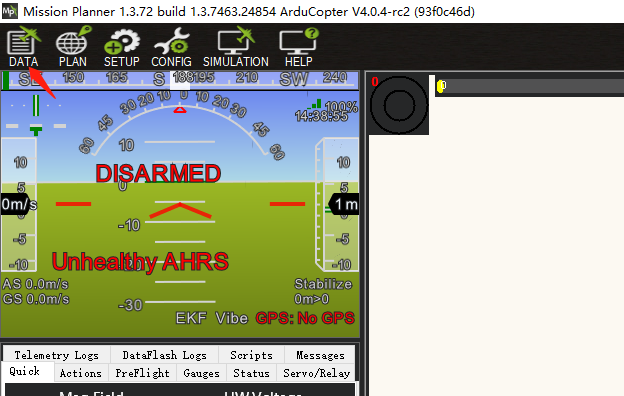
click "DATA" and goto this page,then reboot the board.
Do not at "INSTALL SETUP/Install Firmware" to reboot the board.
Why?when the Mission Planner screen is at "INSTALL SETUP/Install Firmware", if you insert PIXHAWK to your PC, the pixhawk will goto bootloader mode.Resulting in an inability to connect.