Pixhawk2.4.8 & PRO With Mission planner
Tutorial steps
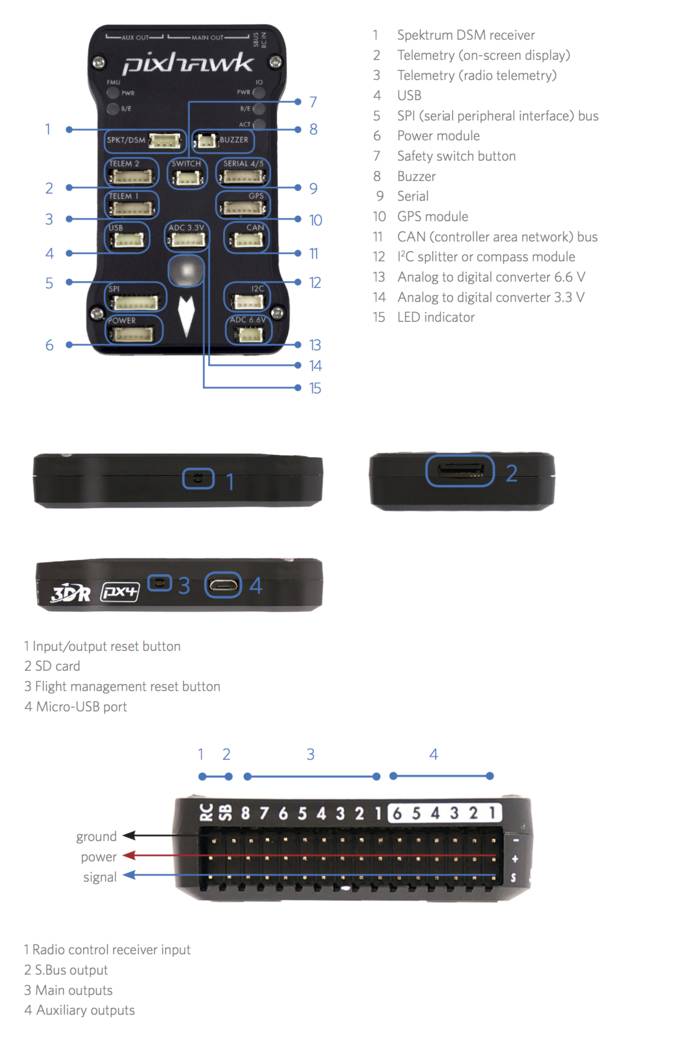
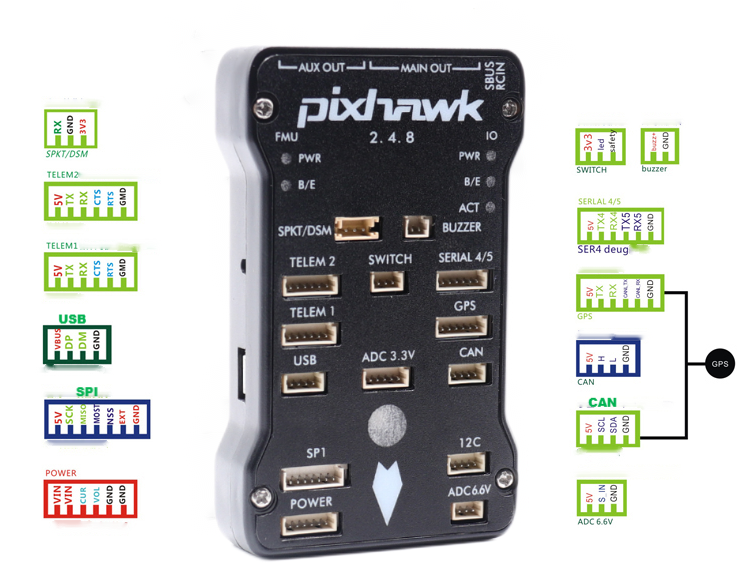
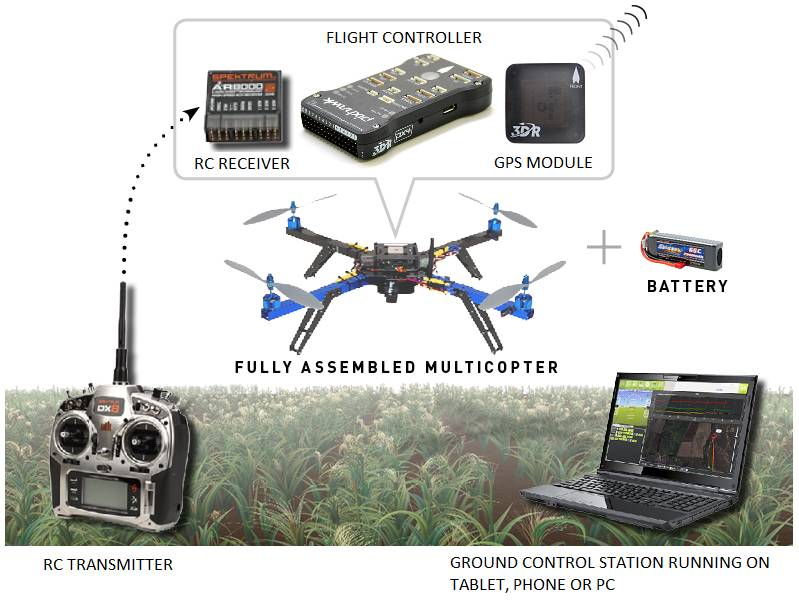
1.Interface description and Connection
4.Connect Mission Planner to pixhawk
8.How to calibrate 3DR Power Module
9.How to Connect ESCs and Motors
The port definition is as follows,
Note
please read below before using pixhawk!!!
1.if you connect your pixhawk to Mission planner,Do not click BootLoader Update Button.
Updating bootloader incorrectly will brick your pixhawk or cannot upload firmware .Now the latest Bootloader maybe has bug, we had upload the stable bootloader, you do not update now.You can press Disconnect button to update firmware(fox example arducopter or arduPlane) as you want.
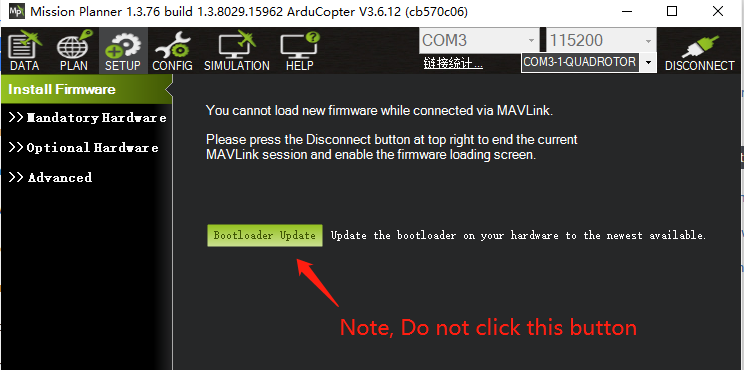
if you update bootloader incorrectly to cause pixhawk fail to boot or cannot upload firmware,please read here,
http://pix.rctoysky.com/how-to-update-bootloader-for-pixhawk-with-sd-card.html
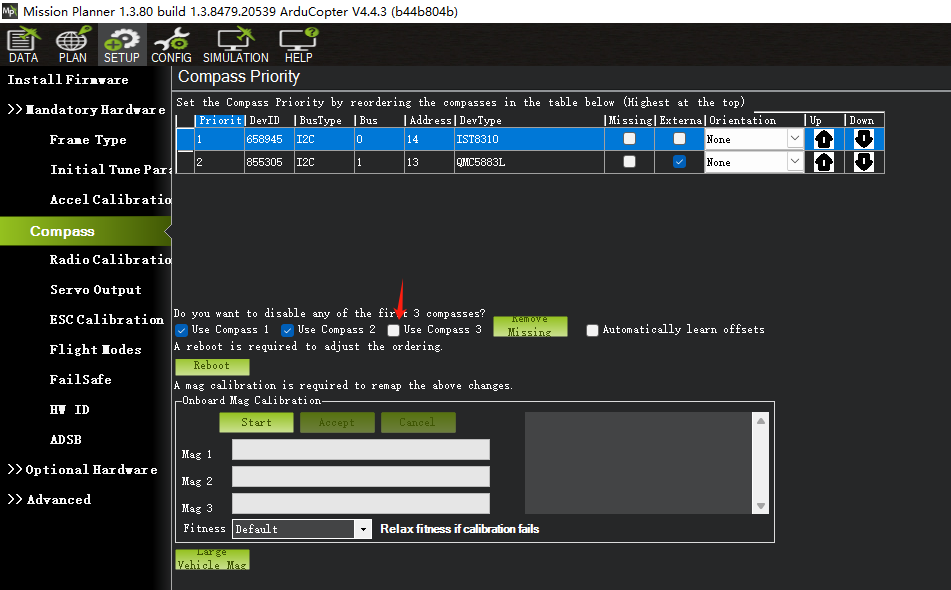
if you use PIXHAWK only, without external compass ,set as below,
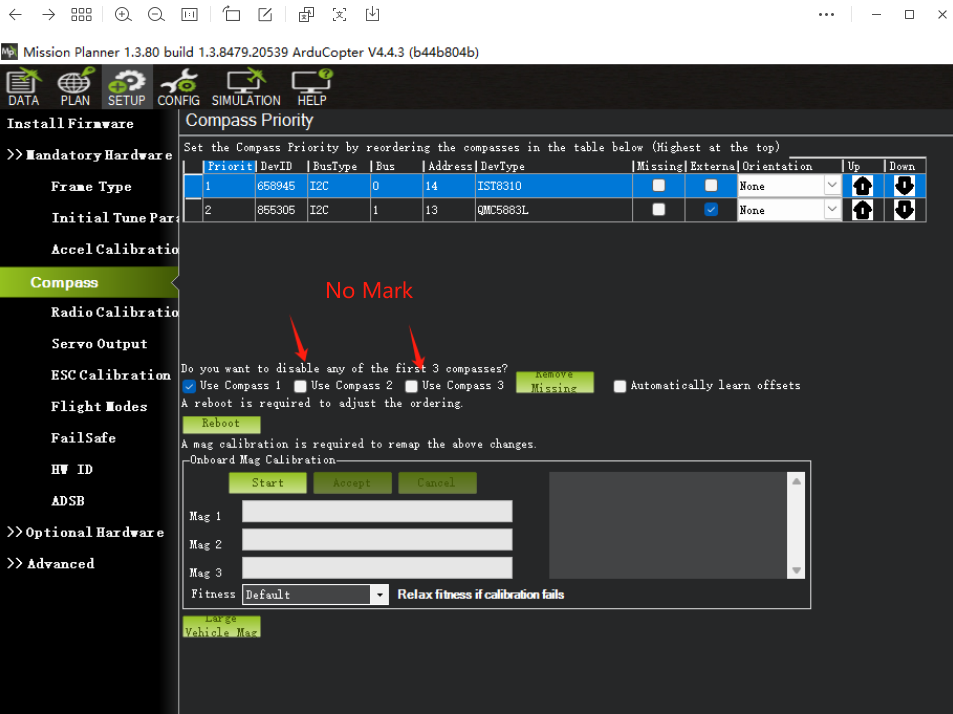
if you use one external compass, set as below
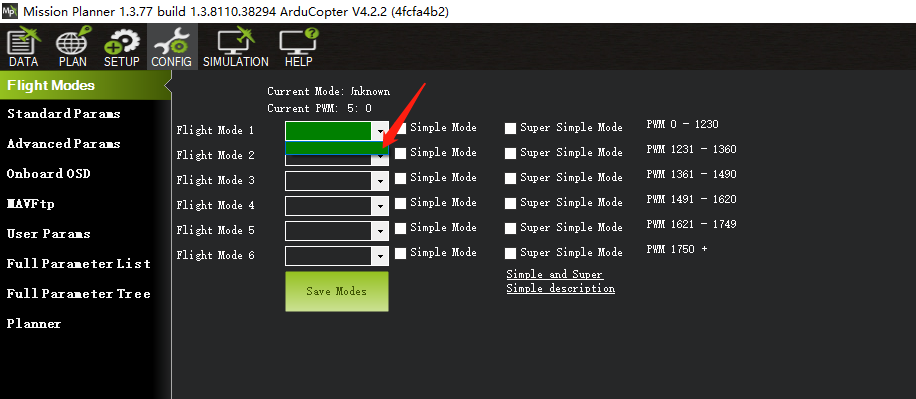
if you upload 4.2.2 version firmware, can not show flight mode, This is because the version of Mission Planner has bug(for example 1.3.77). Please try to use the 1.3.74 version of the mission planner.
download 1.3.74 from here,https://firmware.ap.ardupilot.org/Tools/MissionPlanner/archive/MissionPlanner-1.3.74.msi
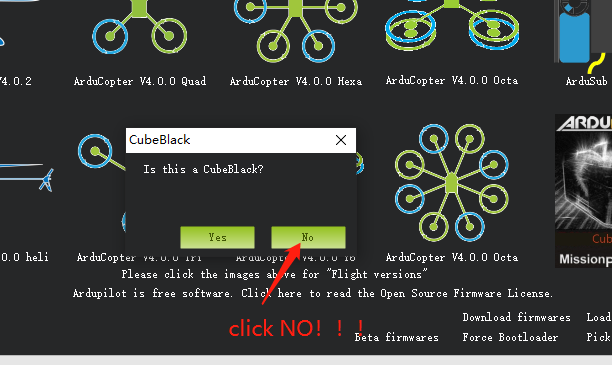
2.IF you want to upload firmware using legacy way ,you may be asked “Is this a CubeBalck?”Remember to click "NO".
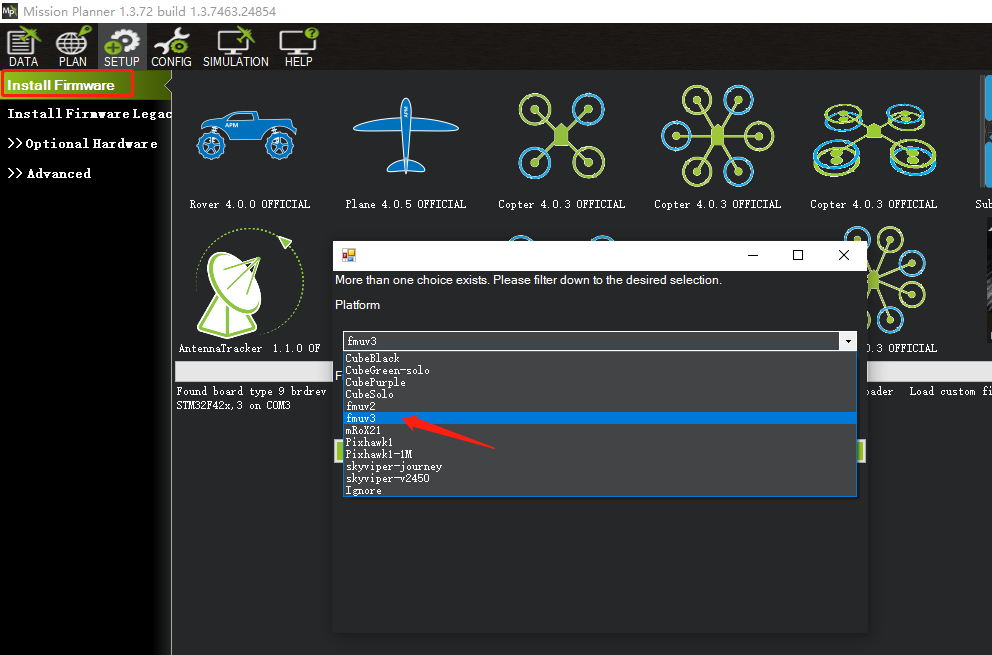
3. If want to upload firmeare, upload FMUV3 firmware, do not select other.
4.Make sure you download the latest version Mission planner,Some people use the old versions, resulting in incompatibility with the new firmware of ardupilot, so before using, please make sure to download the latest mission planner.
The latest version you can download from here:http://firmware.ap.ardupilot.org/Tools/MissionPlanner/
5.compass recognized problem:http://pix.rctoysky.com/compass-calibrated-problem.html
6.IF you use pixhawk for Rover, please read here,http://pix.rctoysky.com/pixhawk248-for-rover.html
7.IF you want to upload PX4 firmware, please read here.http://pix.rctoysky.com/px4-firmware-with-qgroundcontrol.html
Pixhawk Overview
Specifications
- Processor
- 32-bit ARM Cortex M4 core with FPU
- 168 Mhz/256 KB RAM/2 MB Flash
- 32-bit failsafe co-processor
- Sensors
- MPU6000 as main accel and gyro
- ST Micro 16-bit gyroscope
- ST Micro 14-bit accelerometer/compass (magnetometer)
- MEAS barometer
- Power
- Ideal diode controller with automatic failover
- Servo rail high-power (7 V) and high-current ready
- All peripheral outputs over-current protected, all inputs ESD protected
- Interfaces
- 5x UART serial ports, 1 high-power capable, 2 with HW flow control
- Spektrum DSM/DSM2/DSM-X Satellite input
- Futaba S.BUS input (output not yet implemented)
- PPM sum signal
- RSSI (PWM or voltage) input
- I2C, SPI, 2x CAN, USB
- 3.3V and 6.6V ADC inputs
- Dimensions
- Weight 38 g (1.3 oz)
- Width 50 mm (2.0”)
- Height 15.5 mm (.6”)
- Length 81.5 mm (3.2”)
Interface Diagram