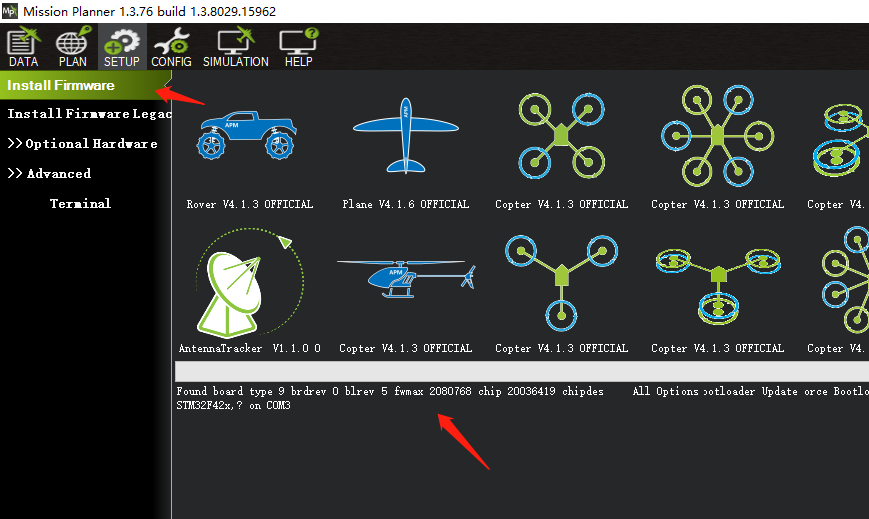
How to update bootloader for pixhawk with SD card?
Some people mistakenly updated the bootloader program, causing pixhawk to fail to start or upload firmware.
Note,
If you update bootloader to cause the pixhawk to fail to start or fail to upload firmware. please read below.
If you can not upload firmware because update bootloader, can not use QgroundControl to upload, because QgroundControl will clear firmware code. Once the code is cleared, you can not use this below method. should read here,http://pix.rctoysky.com/how-to-update-bootloader-for-pixhawk-with-jlink-swd.html
- you should have a TTL serial tool. for example
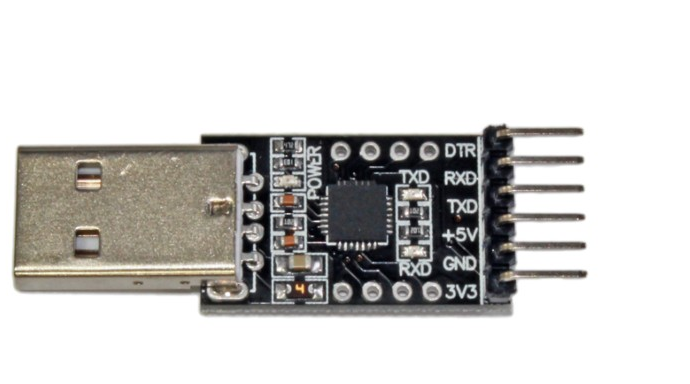
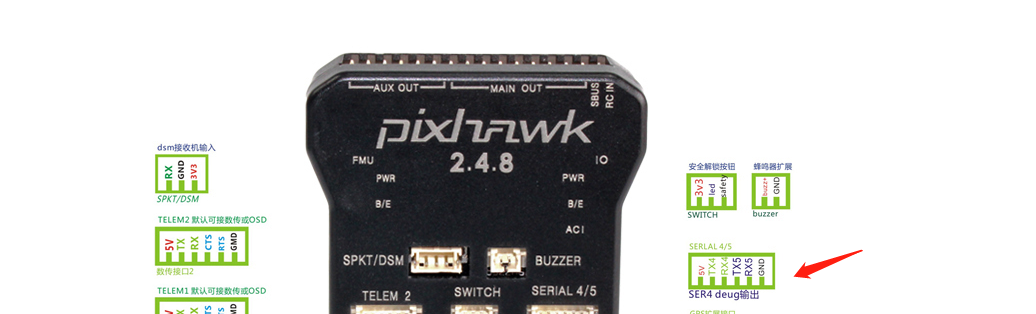
2.connect serial tool to serial port of pixhawk.
Note the RX of serial tool should connect to TX of pixhawk.
TX of serial tool should connect to RX of pixhawk.
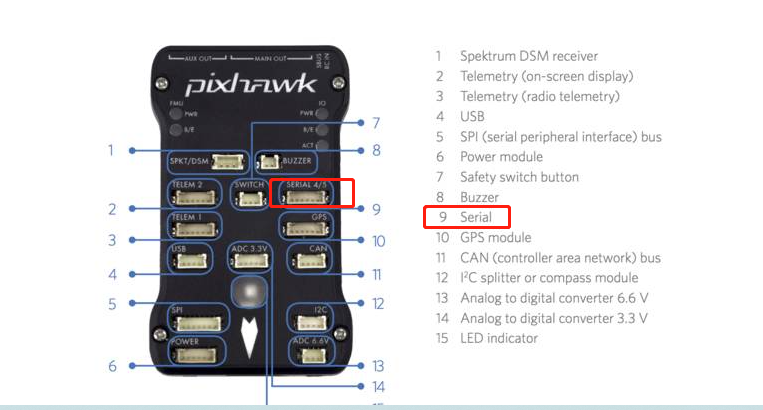
This is the port of serial .should use the 5V TX5 RX5 GND to connect with TTL serial Tool.
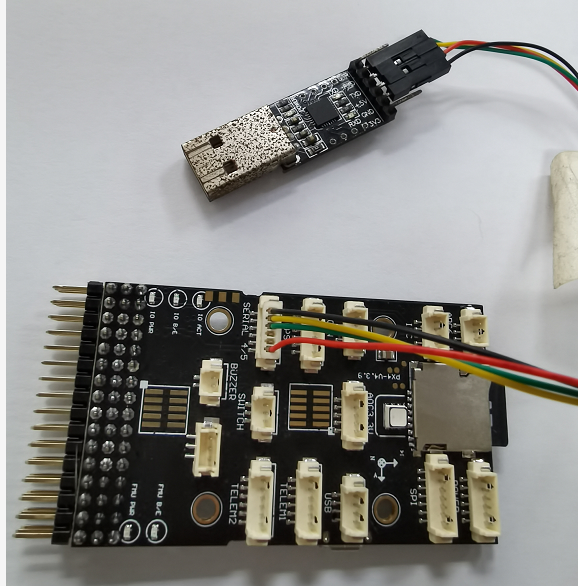
 Connect Like this
3.Download bootloader program from here,
http://pix.rctoysky.com/pixhawk-firmware/px4fmuv2_bl.bin
Note , you should download the stable bootloader from here.Not other.
Copy the px4fmuv2_bl.bin file to SD card. if your SD does not have bootloader catalogue , mkdir it .
and copy px4fmuv2_bl.bin to the bootloader directory

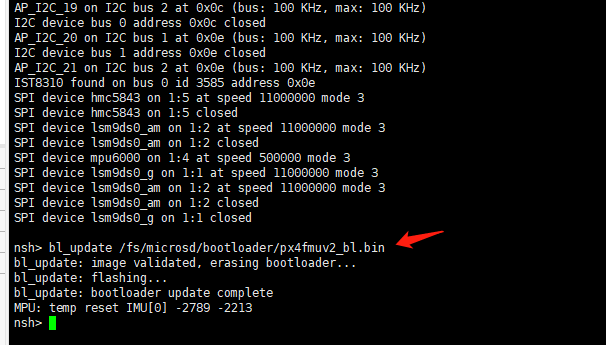
3.insert the SD card to pixhawk. then insert the serial tool to PC,use the serial software tool (for example Xshell )
select the right COM port and baud 57600(not other)
use this command
bl_update /fs/microsd/bootloader/px4fmuv2_bl.bin
to update bootloader from sd card.
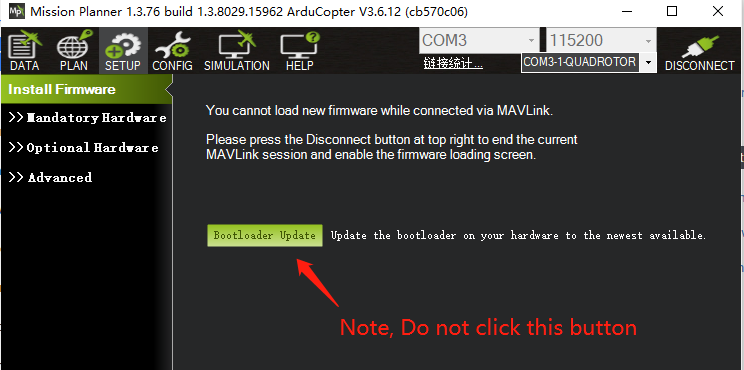
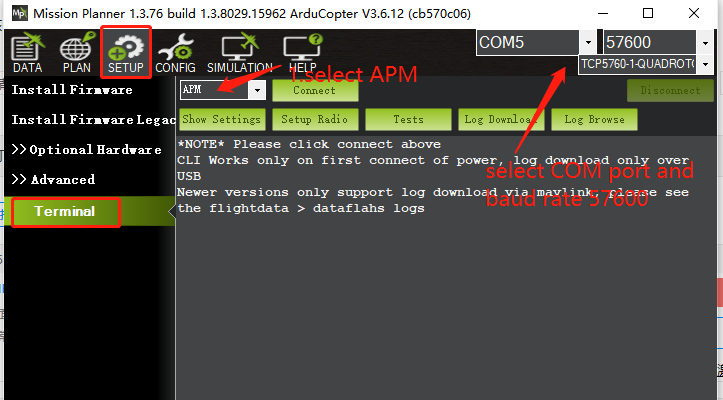
also you can use Mission Planner Terminal with TTL tool(not USB line).Click Connect Button to connect.
4.Remove the serial tool from pixhawk