How to use MiniOSD for pixhawk?
MinimOSD “On-Screen Display” is a small circuit board that pulls telemetry data from your APM or Pixhawk autopilot and over-lays it on your First Person View monitor.
This article provides brief instructions for how to connect the board. For more detailed instructions please refer to the MinimOSD Project wiki.
Overview
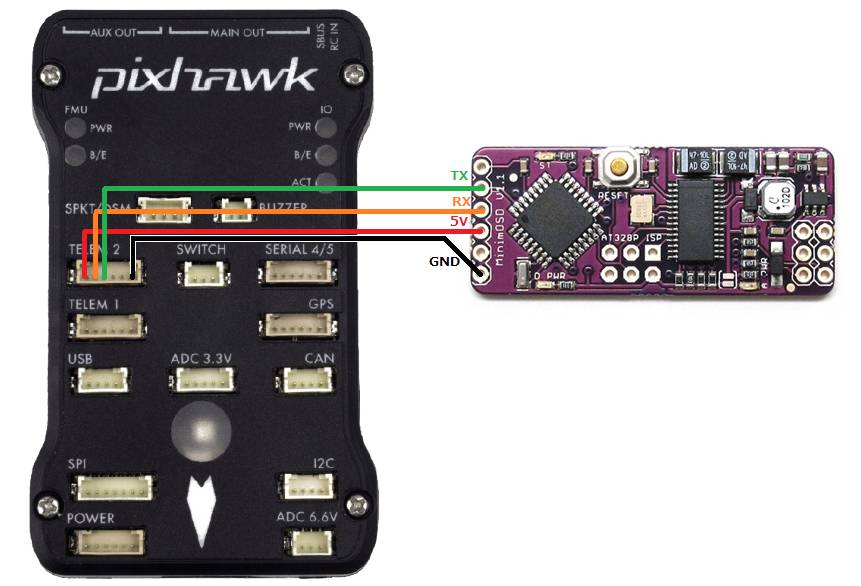
To connect to Pixhawk, use this DF13 6-pin cable to connect to the TELEM2 port.
Basic wiring Diagram
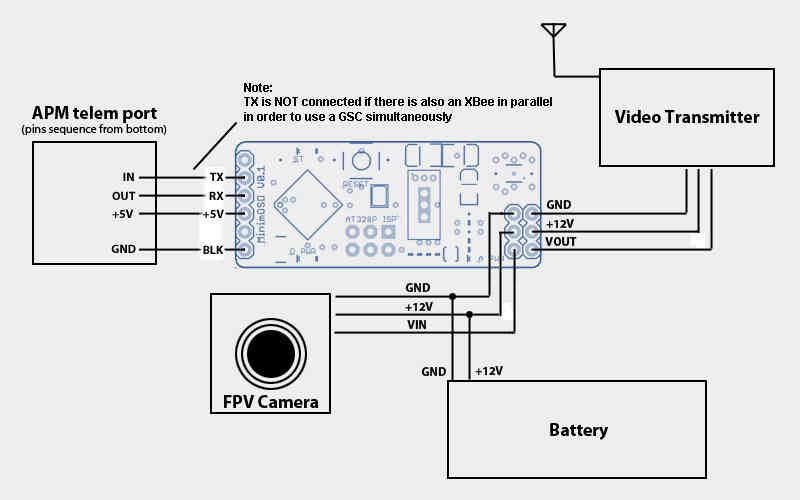
The orignal MinimOSD’s power setup provides two stages to avoid noises coming from servos attached to your ArduPilot boards. Those noises could introduce some glitches on video signal. The independent analog powering from a dedicated battery will heat the board considerably, but the video is the most clean as possible from MAX7456.
Maybe you don’t need to use the two stages. The way those noises would impact on the video signal will vary depending on a chain of aspects like servo’s brand, model, cables length, etc. So, try yourself and see if it’s important for your setup.
Here is the basic diagram which uses two stages approach of MinimOSD board:
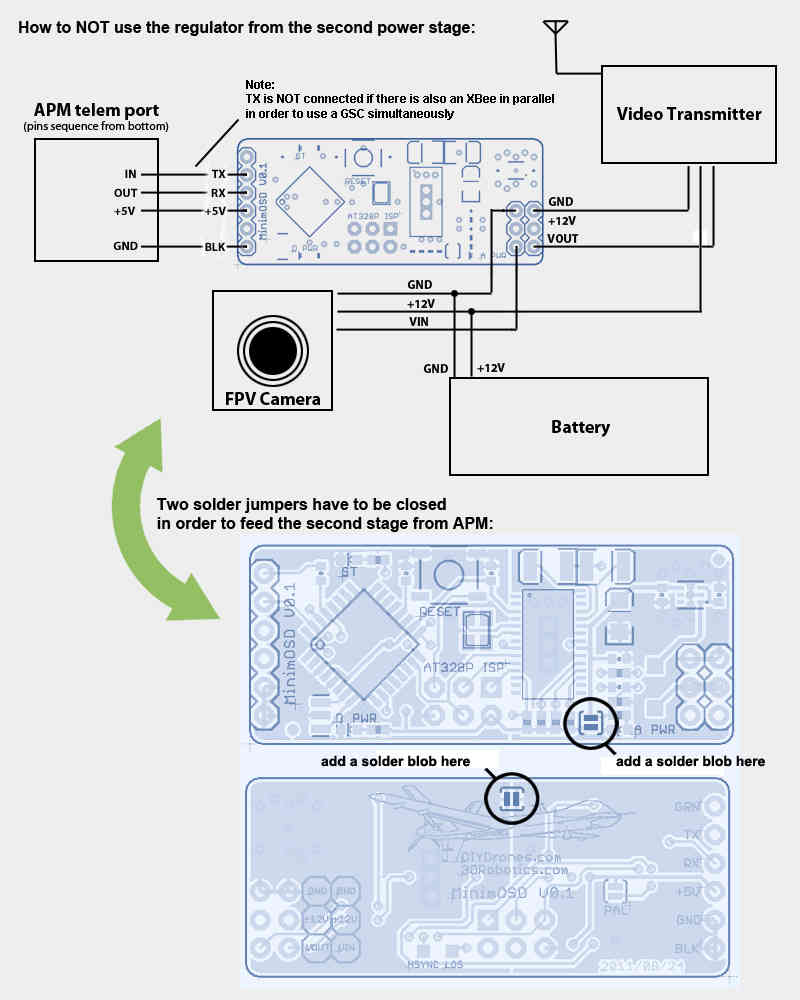
Optional setup for critical cooling conditions
(Hardware V0.1 and 1.0 only)
The second stage regulator from the MinimOSD boards earlier than V1.1 gets too hot on 12V video setups. If your frame has not a good air flow for cooling the OSD board you may want to feed the OSD entirely from APM. Probably it will add some noises from servos, but you’ll be more safe by this way:


